Home
All Speed Tips
Other Tips
Optimization Software
Tech News
Internet Security
Ask The PC Expert
Computer Jargon
Contact Us
Subscribe via Email
Subscribe via RSS

Recent Articles
Learn To Repair PCs With The Right Course
Buying a Refurbished PC
How to Optimize Droid Razr Battery
|
|
Internet Speed Tips
Today is an age of the Internet. Our every day lives are being driven by the world wide web no matter what corner of the globe we are located. Most people are online for at least 2-3 hours a day, and if you are like me who likes to spend hours browsing online, then there is no limit. You are aware of your ISP or Internet Service Provider who gives you the Internet connection. Depending on the schemes, you may be using one of the following - a 54 kbps dial-up connection, 128 kbps ISDN connection, or a 256 kbps to 2 mbps DSL connection or high speed cable broadband connection. If you are like me, you sometimes feel like your Internet is too slow whenever watching a favorite video clip on YouTube or having a video chat session with your friend. You may even consider changing your internet connection plan to another high speed one. You may not be aware of the fact that your Internet connection and your browser can be optimized to give you an ultimate experience with an enhanced browsing speed. There are many methods which can get the job done for you, but we will discuss only those which are used and proven by experts. Lets gets started with the following:
First click to "Run" on the "Start" menu and type "gpedit.msc". Hit enter and the following window will pop up.
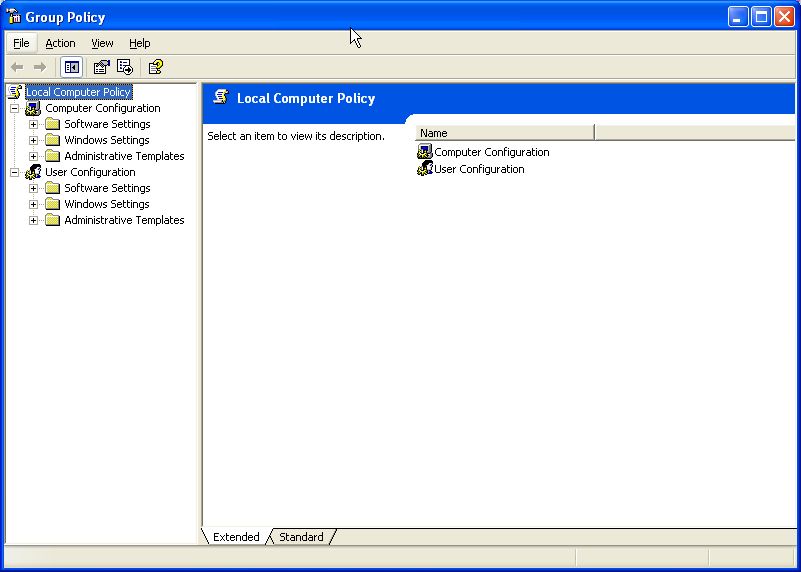
This window is the place where the computer administer configures various desktop settings for a particular system on the network such as start menu options, desktop properties, how different programs are associated with a particular desktop, etc. If you are not on a network and using your system yourself then obviously you are the system administer for your system, and you need to go for "Local Computer Policy" which defines the desktop configuration for the current system on which the steps are being executed. So, the next thing to do is to click on the "Administrative Templates" under "Computer Configuration" option. Whatever changes you make here are directly associated with the registry settings and so you must be very much careful before making any changes. The next window will open up,
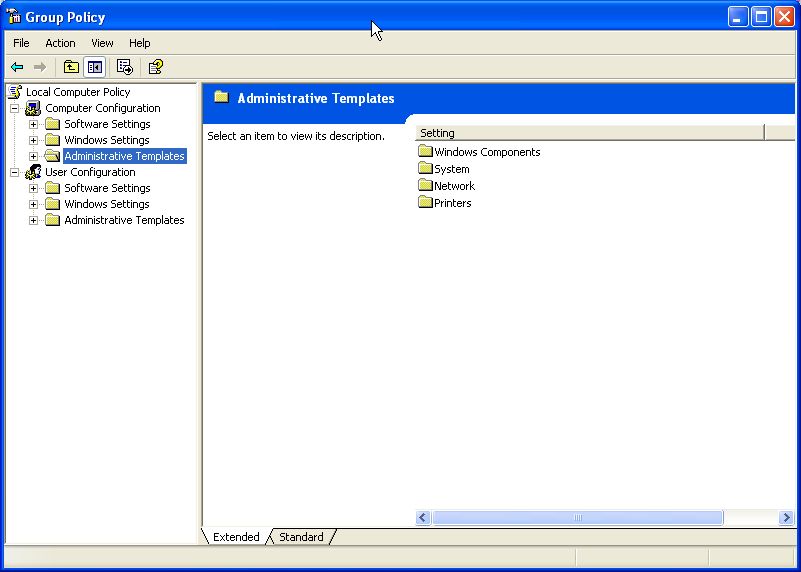
You can see there are four items listed on the right panel, "Windows Component", "System", "Network" and "Printers". Administrative Templates are nothing but simple text files to provide policy information for a particular item in the list. The files are stored on the system with an extension of ".adm". There are mainly four types of .adm files available on your system, each of which is designed for specific tasks. These are – "System.adm", "Inetres.adm", "Wmplayer.adm" and "Conf.adm". Now, we are interested in only "System.adm" files which are required to configure the system, the network, printers and Windows components. Among them, we are only interested in "Network" system.adm files. These system.adm files define the way a client computer connects to the network. This involves various configurations issues with DNS (Domain Name Server) and offline files. Some of them are "DNS Client", "Network Connections", "Offline files", "QoS Packet Schedulers", "SNMP", Background Intelligent Transfer Service" and "DFS Client Settings". We are interested in "QoS Packet Schedulers". QoS stands for Quality of Service. This setting is used to define the priority of various applications running on your system. Based on the priority a specific application receives, bandwidth is allocated to it. Mainly QoS aware applications are considered under this setting. When you click on the "QoS Packet Scheduler" on the right panel, the followings options will show up,
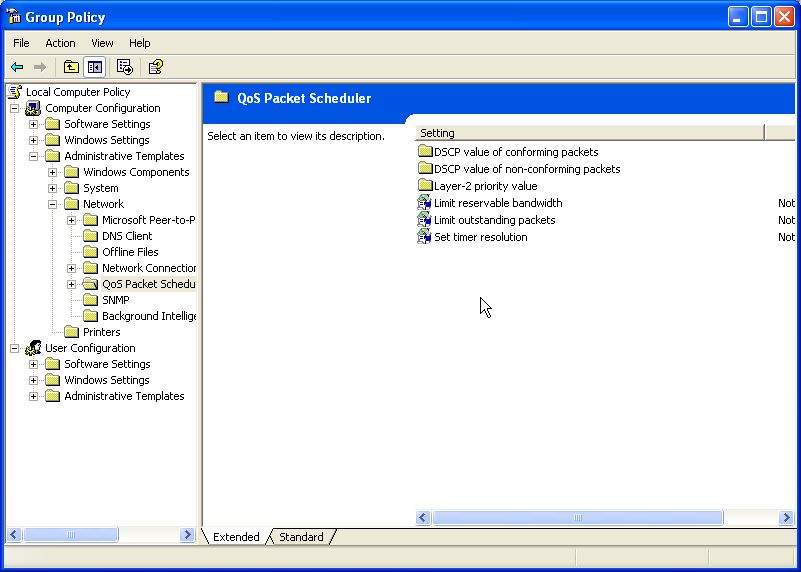
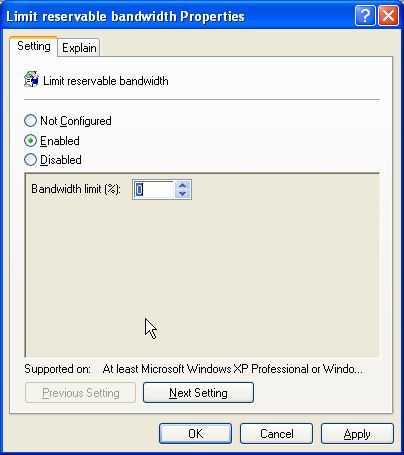
You will see the following entry in the list, "Limit reservable bandwidth". This option determines what percentage of your total bandwidth is reserved by the system for various system specific tasks like automatic windows update or antivirus update. You will see the entry "Not configured" under the state column i.e. the system is still using the default settings. When no settings have been specified by the local user, windows keeps 20% of the total bandwidth available for this task. It's this 20% of your bandwidth which we are after. You have to make your system give you back this 20% bandwidth! So click on it,
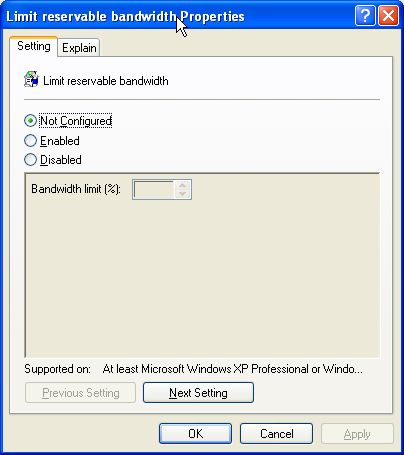
The above window will open up which allows you to change the default settings for this item of "QoS Packet Scheduler". If you see that the "Not Configured" option is checked in, then check the "Enabled" option and the lower percentage selector dropdown box will be activated. Make sure you reduce it to "0%". It's shown in the following screenshot,
Now click on "Ok" and all the settings will be in effect once you restart your computer. The next time you log onto your computer, you will experience an enhanced browsing speed. This trick is mostly beneficial for users who are using lower bandwidth connections like dial-up, ISDN or DSL. They can really use this extra 20% bandwidth from their internet connection. However, if you are a high speed internet user, why do you want to let your Windows reserve a significant portion of your total bandwidth. There are always ways in which you can make use of this extra bandwidth!
If you enjoyed this post, please
or
|
-By Dominic
Web site and all contents © Copyright ComputerTooSlow.com 2012, All rights reserved.
|
|